Services WordPress Theme tutorials
Manage Services WordPress theme with ease
We've prepared a set of tutorials for the Services WCAG ready WordPress theme. This business WordPress theme includes 4 demo site versions and we described most of the items from all theme's versions.
Browse the topics from the menu on the right side and follow instructions and find out more interesting features that this awesome WordPress theme brings you.
The following tutorials are the extended guides for sections described in the Services WordPress theme manual or downloadable at your account (for active subscribers of School WordPress theme).
How to find a WordPress widget easily?
Please follow the general tutorials related to this topic:
- How to find a WordPress widget easily?
- Watch the video about the simplest way to find the sidebar names and the widget type you want to customize.
How to manage accessibility tools above the menu?
WCAG tools icons you’ll find at the top-right corner of the PE Services WordPress theme demo site.

WCAG tools icons are divided into three categories:
- Contrast
- Layout
- Font
Each category has few icons to use. Using these tools will help visually disabled website visitors to navigate across the website. Remember that it’s only the demo example here. Icons can be easily defined in the backend of the website.
How to manage WCAG tools icons?
Go to your WordPress admin panel. Navigate to “Theme Options” and choose “Accessibility.” You can show accessibility tools in a modal window or display them inline.
You also have many other accessibility settings to configure in the WordPress theme options. Settings responsible for icons used on the front page are:
- Wide layout (Enable / disable wide layout.)
- Font sizer (Enable / disable font sizer.)
- Night mode (Enable / disable night mode.)
- (High contrast mode)
But there are also other WCAG settings that you can manage. Check here the detailed description of each WCAG settings section.
How to change a logo in Services WordPress theme"
The PE Services WordPress theme displays the logo image in the top left above the main menu.

Open your WordPress dashboard. Navigate to “Theme Options” -> “Basic Settings” -> “Logo.”
You can upload any image of your choice and remove the existing one. After Saving the settings, the new logo will appear on the front page.
How to manage the main menu in the Services WordPress theme?
The PE Services WordPress theme’ demo contains an extended menu. Our example is based on the Max Mega Menu plugin.
Max Mega Menu settings
Let’s see how to set up the mega menu. Open your WordPress dashboard and navigate to the “Mega Menu” item. Open it.

You’ll see the available settings divided into four tabs:
- General Settings
- Menu Themes
- Menu Locations
- Tools
You can configure all settings in the way you need.
How to add menu links
See how to add a link to the menu in WordPress. Menus in WordPress may contain links to pages, categories, custom links, or other content types.
Log into your WordPress dashboard. Navigate to Appearance, and select Menus:
Now let’s add a new menu item
Choose (for example) the “Custom link” from the list. Type in the URL you want to have for this menu button, the link text, and then click Add to Menu:

As you can see in the screenshot below, the new menu item appears on the Menu structure (1). It’s on the top because we have moved it to the top to display the “Test” item as the first Menu item. The “Test” item (2) can still be edited so that you can change the name, link, title attribute, and description (if supported). Use the “Save menu” button (3).

This way, you can create and manage all menu items. You can also move items up and down to change their order.
Refresh the site, and you will see your new custom page and link in the navigation menu. Below is the final effect on the PE Services demo front page:
For the full documentation visit: https://www.megamenu.com/documentation/
How to manage search at the right top in Services WordPress theme?
The PE Services WordPress theme’s demo displays a “Search” field on the front page, in the right top corner.
Let’s see how to manage it.
Open your WordPress admin panel. Navigate to “Theme Options” and choose “Basic Settings.”

Now scroll down to the “Search form in topbar” option. You can enable or disable the search form.

How to manage the main slider in the School WordPress theme?
Please follow the general tutorials related to this topic: How to manage the main slider?
How to manage color boxes in the School WordPress theme?
The PE Services WordPress theme demo site (below we show the example fic clinic WordPress theme version) contains a set of color boxes displayed below the slider.
How to manage color boxes?
Boxes are displayed with the PE Box widget. Open your WordPress dashboard. Navigate to the “Appearance” -> “Widgets”. Find the “PE Box” widget on the list. It’s purposed for displaying front boxes with icons.

The clinic's WordPress theme version boxes are placed in the “Header Bottom” sidebar but you can place them where you want.
As you can see, one box is one widget. It means, if you want to have the same result as in our demo example, you have to create/manage three different boxes as separate widgets.

Let’s see the PE Box widget settings:

- Widget Title - enter the title
- Link - enter the link
- Show icon -Yes/No
- Icon height (in pixels) - enter the value
- Icon width (in pixels) - enter the value
- Icon image - select the image
- Icon hover image - select the image
How to display 3 boxes in one line?
Select the widget size for desktop using bootstrap sizes. In our examples we want to place 3 items (widgets) in the row, one by one - it means that you need to select 33% for each widget.
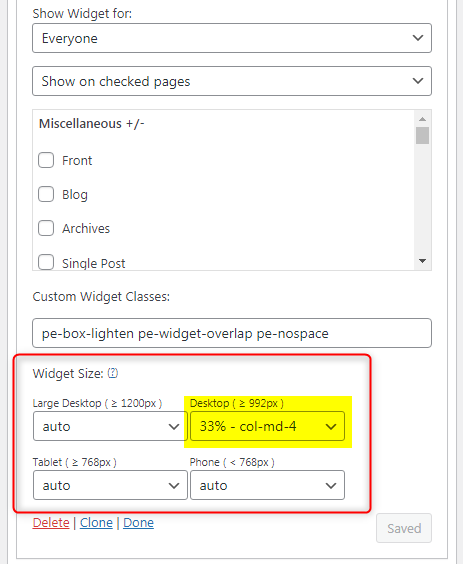
Read more about how to use the Widget Size option
The PE Box widget is used for:
PE Services Clinic Demo version - the widget is assigned to sidebar Header Bottom (example described above)
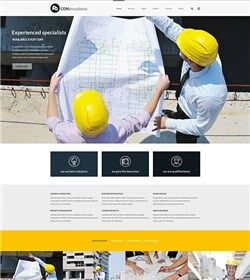
PE Services Constructions Demo version - the widget is assigned to sidebar Header Bottom.
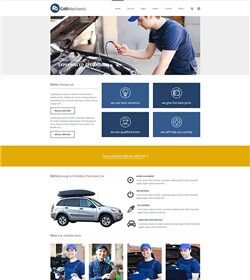
PE Services Car Mechanic demo version - the widget is assigned to sidebar Top 1
For all examples, we’ve used the same widget. The configuration is almost identical for all cases.
How to manage Short Info widget in Services WordPress theme?
The PE Services demo sites contain a short info section displayed on the front page. Below find the example for Services Clinic Demo version
That section has three widgets:
- Our mission
- It’s our passion
- Health programs
Each of the boxes is displayed with the PE Short Info widget.
How to manage Short Info boxes?
Open WordPress dashboard. Navigate to the “Appearance” -> “Widgets”. Find the “PE Short Info” widget on the list. It’s purposed for displaying short information.

One box on the front page is one widget. It means, if you want to have the same result as in our demo example, you have to create/manage three different boxes.
Let’s see the PE Short Info widget settings:

- Widget Title - enter the title
- Link - set the link, it's optional if you want to link the title to any source of your website or external
- Icon - enter the icon code - Font Awesome class
- Description - enter the description
- Animation type - choose the type from the list (animation type affects the way widgets appear when loaded)
- Animation Delay (milliseconds) - enter the value
Check other examples from demo sites of Services WordPress theme
For all examples below, we’ve used the same widget. The configuration is almost identical for all cases.
The PE Short Info widget is used for:
PE Services Clinic Demo version - the widget is assigned to
- sidebar Top 1 (described in this tutorial)
- and also on the Bottom 3 sidebar and looks as follows:

Check its settings:
- and also on the Footer sidebar and looks as follows:

PE Services Constructions Demo version - the widget is assigned to sidebar Top 1
PE Services Dental Demo version - the widget is assigned to sidebar Top 1
PE Services Car Mechanic demo version - the widget is assigned to sidebar Top 3

How to manage the color section with text in the Services WordPress theme?
You’ll find a color section with text on the PE Services WordPress theme’s demo site (below the example for the Medical Clinic version). It’s placed on the demo’s front page using the simple Text widget but the section is fill in the distinguished background color.
How to change the color of the section?
Open your WordPress dashboard. Navigate to “Theme options” -> “Colors.”

The text widget displaying the box content is placed in the Top2 position, so it is required to set the colors for this position. Scroll down in the “Colors” section and find settings for the Top2 position.
If you want to display the color section with text in different positions, you must define colors for a chosen position.
Let’s see available options for the selected section:

- background-color - pick up the color
- text color - font color for the text of the content
- widget title color - font color for the widget's title (if you use it)
- link color - potentials links color for this section
- color on hover / active - links color on hover
How to manage the Text widget?
In your WordPress dashboard, navigate to “Appearance” -> “Widgets.” and find the Text widget on the list.

If you want to include HTML or shortcode into the sidebar it's recommended to use Custom HTML widget type. Check availableshortcodesandready-made HTMLfor Services WordPress theme.
The Color section with text using the Text widget or Shortcodes is used for:
PE Services Clinic Demo version- the widget is assigned to sidebar Top 2 (example described above)
PE Services Constructions Demo version - the widget is assigned to sidebar Bottom 2
PE Services Dental demo version - the widget is assigned to sidebar Content Top

PE Services Car Mechanic demo version - the widget is assigned to sidebar Top 2

How to manage team profiles in the Services WordPress theme?
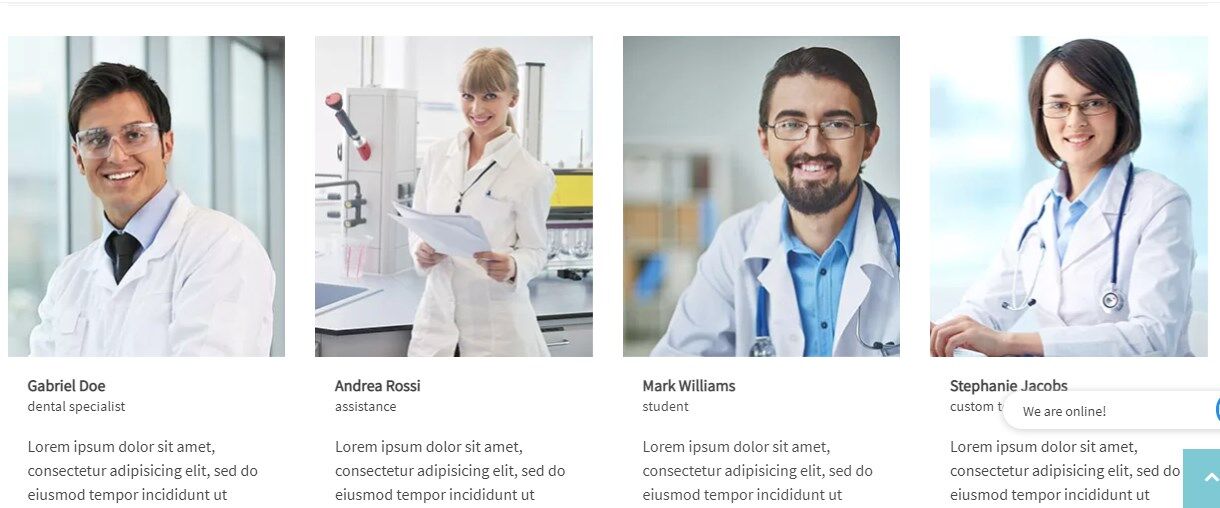
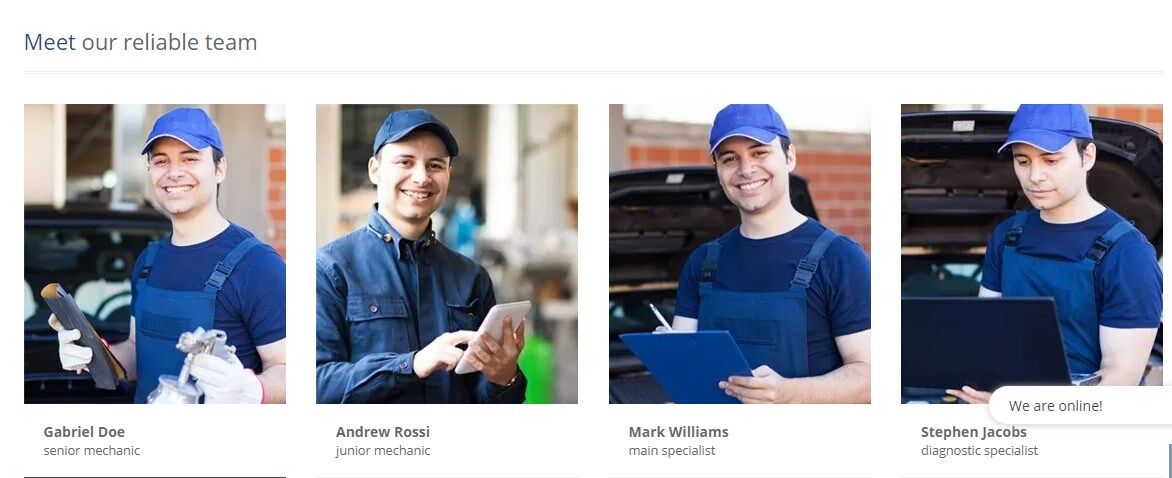
PE Services WordPress theme demo site includes the section with team members’ profiles like on the example below.
This section is based on the PE Team Carousel widget.
How to create team profiles?
Profiles need to be created first. For this purpose, open your WordPress Dashboard and navigate to “Members.”

Each profile can contain a rich set of information, including:
- Name
- Description
- Member info (profession, social channels links)
- Contact data
- Opening hours
- Image
After creating a list of profiles, it’s time to display them in the chosen position on the website.
How to display team members on the front page?
In your WordPress dashboard, navigate to the “Appearance” -> “Widgets” and find PE Team Carousel on the list.

Let’s see the PE Team Carousel settings:

The widget allows you to display selected options taken from the profile view. It's helpful if you are planning to display many arrangements for the related for example to different profession in the company.
- Widget title
- Type of view: Carousel View or Grid View
- Order
- Services - This setting allows you to display users from a specific profession. You can select it from the list. If you do not select any, it will display all professions.
- Image size: thumbnail, medium, large
- Number of Members to show
- Number of Members in one row
- Member description limit
- Show or hide Social icons
- Show or hide Member name
- Show or hide Member profession
- Show or hide Member avatar
- Show or hide Member description
The PE Team Carousel is used for:
PE Services Clinic Demo version - the widget is assigned to sidebar Top 3
PE Services Constructions Demo version - the widget is assigned to sidebar Top 3
PE Services Dental demo version - the widget is assigned to sidebar Content Top
PE Services Car Mechanic demo version - the widget is assigned to sidebar Top 3
How to manage a "Reliable team" widget in the Services WordPress theme?
PE Services WordPress theme demo site includes the “Reliable team” section, displayed on the front page:

This section is based on the text widget.
How to manage the widget?
In your WordPress dashboard, navigate to the “Appearance” -> “Widgets” and find the Text Widget on the list.

Let’s see the Text widget settings:

This simple widget includes some text and the “read more” button from the typography collection of Services WordPress theme.
The "Reliable team" section is used for:
PE Services Clinic Demo version - the widget is assigned to sidebar Top 3
PE Services Car Mechanic demo version - the widget is assigned to sidebar Top 3
RS Slider in the middle of the page on Clinic Services demo version
The PE Services WordPress theme’s demo - Clinic Version site contains a slider, placed in the middle of the front page. It’s displayed using the Revolution slider plugin.
How to manage the slider?
To display the slider in the widget it is required to configure the Revolution slider first. The process of creating single slides is the same as for the slider set in the header area. Learn how to do it from the article: How to manage the main slider?
Our example slider is displayed using the text widget. That widget is placed in the Bottom 2 sidebar.
Open your WordPress dashboard and navigate to the “Appearance” -> “Widgets” and find the “text widget” on the list. We simply placed the shortcode of Revolution Slider to display the album.

Let’s see the widget settings below. The code implemented there comes from the created Revolution Slider album.

How to display the slider in the full layout width?
To get the effect as on our demo, set the option for the width of the Bottom 2 position. In your WordPress dashboard open “Theme options” and go to “Layout”.

And scroll down to find options for the “Bottom2 width”. The width has to be set as “Full screen width”.
How to manage Advice worth reading widget in Services WordPress theme?
The PE Services WordPress theme’s demo site includes a section called “Advice worth reading.”
For that purpose, we’ve used the PE Recent Posts plugin created to show recent posts.

How to manage the widget?
Open your WordPress dashboard and navigate to the “Appearance” -> “Widgets”. Find the PE Recent Posts widget on the list.

For our purposes, we’ve placed the widget is placed in the Sidebar: Bottom 3 position. Of course, you can choose another widget position.
Here you can download for free and learn more about the PE Recent Posts WordPress plugin, and discover its features.
The PE Recent Posts is used for:
PE Services Clinic Demo version- the widget is assigned to sidebar Bottom 3
PE Services Car Mechanic demo version - the widget is assigned to sidebar Bottom 4
How to manage the "Most frequent questions" widget in the Services WordPress theme?
The “Most frequent questions” is the section in the bottom part of the PE Service’s Clinic demo front page. It’s placed there using the “Text” widget.

Let’s see how to manage the FAQ widget
In your WordPress dashboard, navigate to the “Appearance” -> “Widgets” and find the Text Widget on the list.
Use Custom HTML instead of Text widget for shortcodes
The widget displays the information in such a way because the Accordion shortcode was placed in the content area. More information about the Accordion shortcode and other available shortcodes for Services WordPress theme you can find here.
FAQ widget is used for:
PE Services Clinic Demo version- the widget is assigned to sidebar Bottom 4
PE Services Dental demo version - the widget is assigned to sidebar Content Top
PE Services Car Mechanic demo version - the widget is assigned to sidebar Top 3
How to manage testimonials in Services WordPress theme?
The testimonials example used on the PE Services WordPress theme demo site is the “Patients say” section. It’s based on the PE Testimonial Carousel widget that displays testimonials items.

How to create testimonials items?
Open your WordPress dashboard. Navigate to “Testimonials” in the left panel and click it. You will open the list of existing testimonials. There is also an “Add new” option available ( you can create a new testimonial here.)
Choose the first item from the list and click it to open.

Single testimonial content settings

You can edit the title (1), permalink (2), and the main content (3) using the editor.
Under this area, you will see an additional box:

You can provide a testimonial occupation or company name there.
On the right, under the “Publish” box, you will see the “Avatar image” box. It can be used to upload the featured image for this single testimonial, it can be a company name or a user profile image.

Display testimonials with a PE Testimonial Carousel widget
To display the testimonials, it is required to configure the widget - PE Testimonial Carousel.
Open your WordPress dashboard. Navigate to the “Appearance” -> “Widgets” and find the PE Testimonial Carousel on the list. You can place it in the position of your choice. Our example is placed in the Sidebar: Bottom 4.

Let’s see the widget settings:

- Widget title - enter the title
- Number of testimonials to show - enter the value
- Testimonial opinion limit - enter the value
- Show/Hide Testimonial Occupation - Yes/No
- Autoplay interval - enter the value
The PE Testimonial Carousel is used for:
PE Services Clinic Demo version- the widget is assigned to sidebar Bottom 4
PE Services Dental demo version - the widget is assigned to sidebar Bottom 4
How to manage social media links and icons in the Services WordPress theme?
The PE Services WordPress theme’s demo sites contain a section at the bottom of a website, where social icons are displayed. Five icons are displayed there:
- Facebook icon
- Twitter icon
- Google+ icon
- Pinterest icon
- and YouTube icon
You can easily manage icons and add new ones or edit existing ones if you installed the demo copy of the Services WordPress theme.
Open WordPress dashboard. Navigate to “Appearance” -> “Widgets” and find the “PE Social” widget on the list.
![]()
We are displaying this widget in the “Social” Sidebar, but of course, you can add it to any other widget position.
Let’s see the available widget options:
![]()
- Title - enter the widget title (it's hidden for the Social sidebar)
- The list of created items - you can edit or remove each item
- Add a new item - use the button to create a new item on the list
- Target - _blank/_self - the way to open a link in the current or new browser window
By clicking the “Add new item” you get access to the same options as using the “Edit” button for existing items.
![]()
- Name: enter the name
- Icon: enter the icon Font Awesome class name
- URL: enter the URL
How to manage copyrights in Services WordPress theme?
The PE Services WordPress theme’s demo site brings the “Copyrights texts.” field. You can find them at the bottom of the website.
It’s straightforward to change them or remove them permanently.
How to manage the copyrights area?
Open your WordPress dashboard. Navigate to “Theme Options” -> “Footer.”

The “Footer” section configuration looks as follows:

Available options:
- Copyright Info - enable/ disable copyright info
- Copyright text - Add text for copyright info at the bottom of the page - HTML is allowed.
- PixelEmu copyright - enable/ disable PixelEmu copyright
Coming soon, thank you for your patience.
Coming soon, thank you for your patience.
Coming soon, thank you for your patience.
Coming soon, thank you for your patience.
Coming soon, thank you for your patience.
Coming soon, thank you for your patience.
