How to create multilingual WordPress site with Polylang
Multilingual WordPress plugin - Polylang
Polylang is a great WordPress plugin to make a multilingual WordPress site. Read the following tutorial to find out how to set up Polylang, create multilingual menu, content (post, pages) and widgets. Find out how to set up a language selector.
Set up Polylang
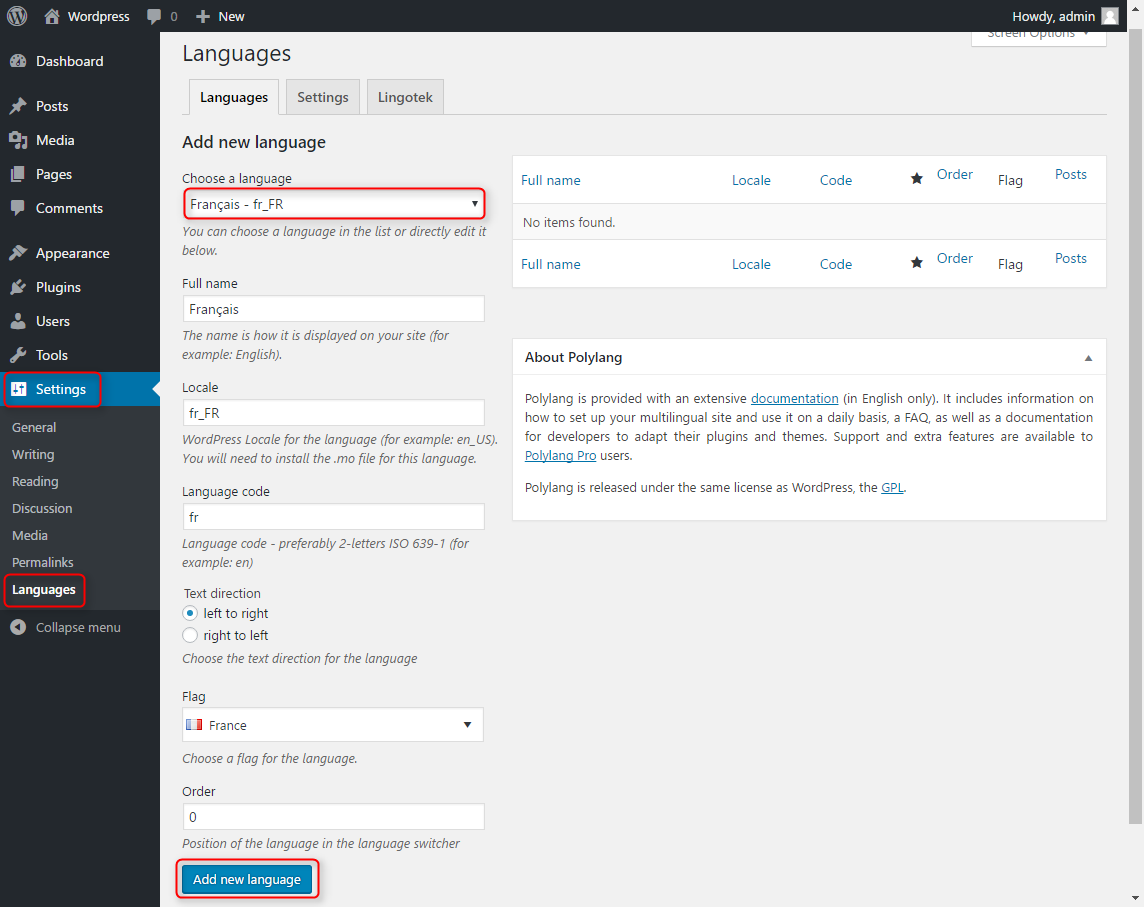
First of all you need to install and activate Polylang plugin. Then go to Settings -> Languages and add your desired languages.Choose for example French and click Add new language.

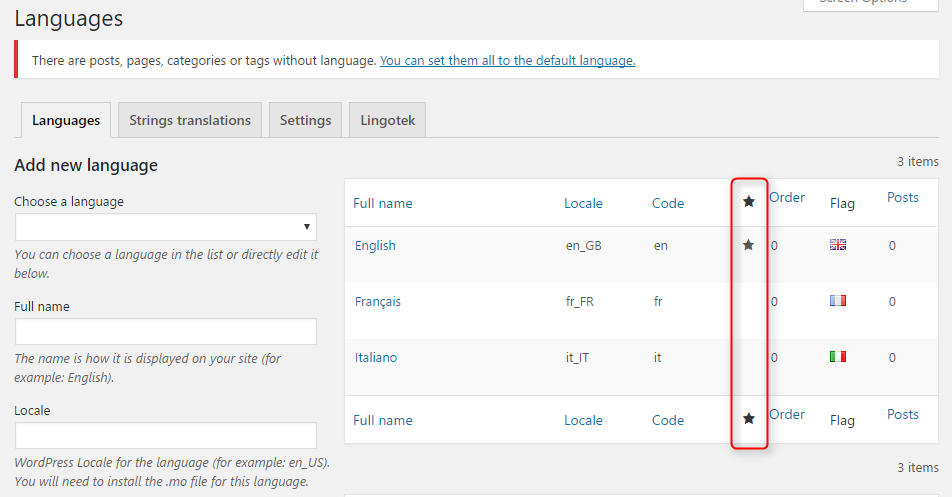
Set your default language using star icon:

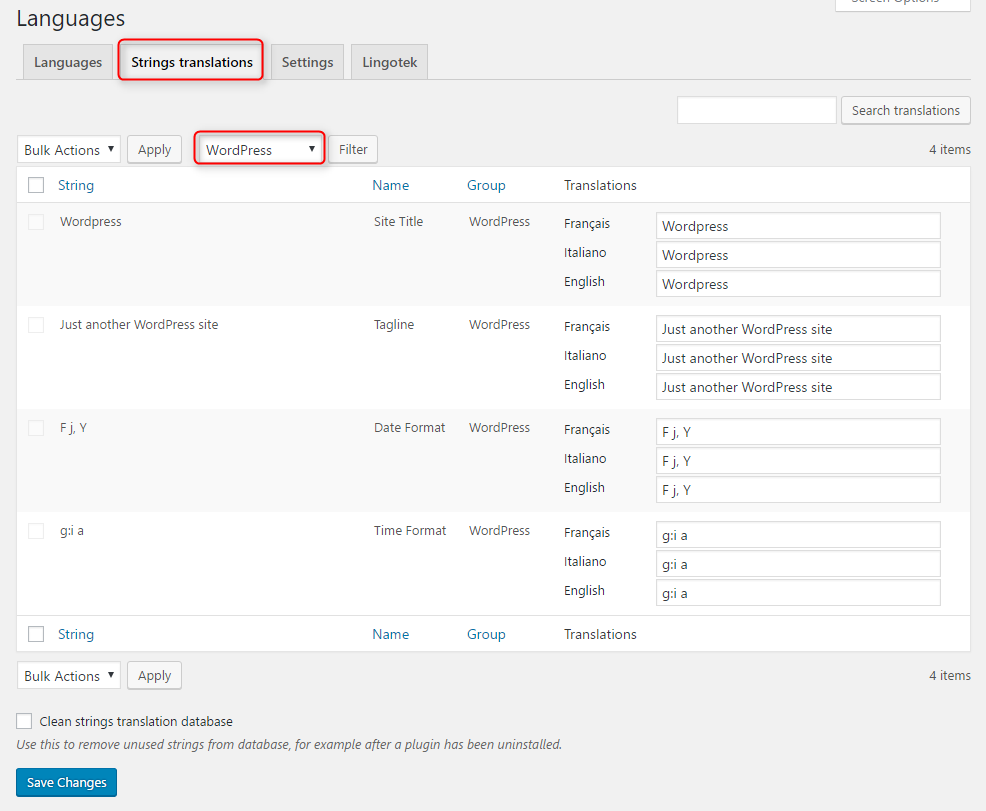
Go to tab Strings Translations. There you can translate Wordpress Site Title, Tagline, Date Format, Time Format:

You can also translate widgets titles or even content (if we translate Text widgets).

After all click Save Changes.
Set up multilingual menu
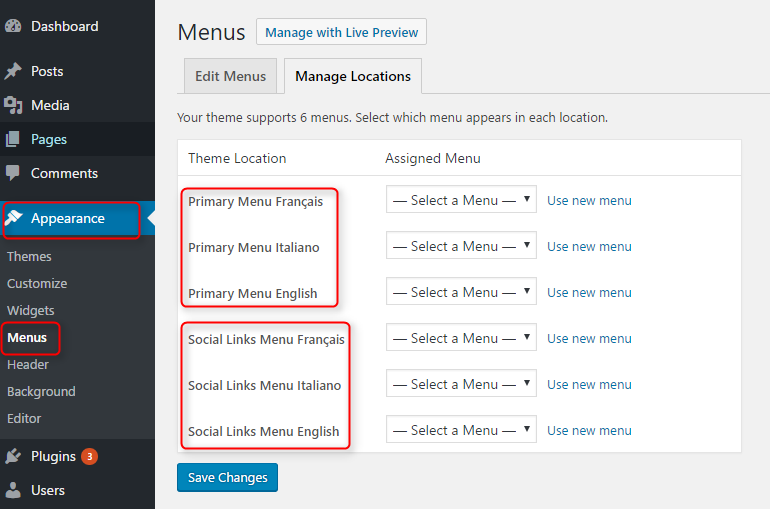
Polylang creates new theme locations for every menu. You need to create separate menu for every language and then assign them to appropriate theme locations.

Multilangual Content (posts, pages etc.)
Go to Posts ans select desired post.

Click on + icon next to language flag.

Now enter title, description and click Publish. You have now post translated to French.

Multilangual Widgets
With Polylang you can assign widget to one or all languages.
- Go to Appearance -> Widgets.
- Add widget to desired sidebar.
- You can set here one or all languages.

Set up a language switcher
You can add a widget with language switcher to make your multilanguage website easy to navigate by using widget Language Switcher. You can set here also some display options.

NOTE: Language switcher will be visible only if you have at least one post assigned to languages.
I've described only basics so you can just run multilangual website. A good start will be Polylang documentation.