Boost your blog's attractiveness with this simple trick!
Looking for nice effect on WordPress blog's intro post? Here it is, simple and tricky. Use the simple code and successfully change your blog look!
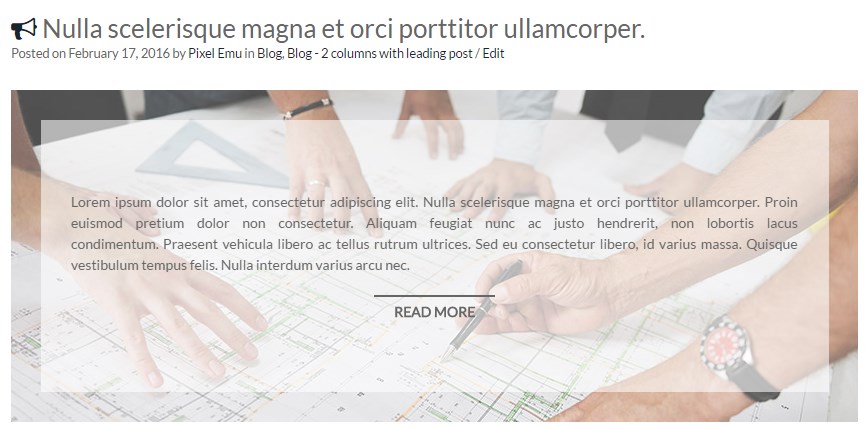
On screen below we have post thumbnail and intro content visible on hover. Take a look how to achieve the same result on your blog!

Prepare the image
First of all we need to make sure that yout theme code displays intro images.
You need to locate part of code responsible for displaying post images in your theme.
In PixelEmu themes it will be for example: tpl/posts-for-listing.php where you can find code related with post displayed in loop (listing), in default Twenty Fourteen theme it will be: inc/template-tags.php
WordPress function which displays Post thumbnail is the_post_thumbnail().
It may include two optional parameters:
size: Image size to use. Accepts any valid image size, or an array of width and height values in pixels (in that order).
attr: Query string or array of attributes.
So our base code to display thumbnail looks like this:
<?php
if ( has_post_thumbnail() ) {
 the_post_thumbnail();
}
?>
In example above we have additional function has_post_thumbnail() to check if thumbnail exists for selected post.
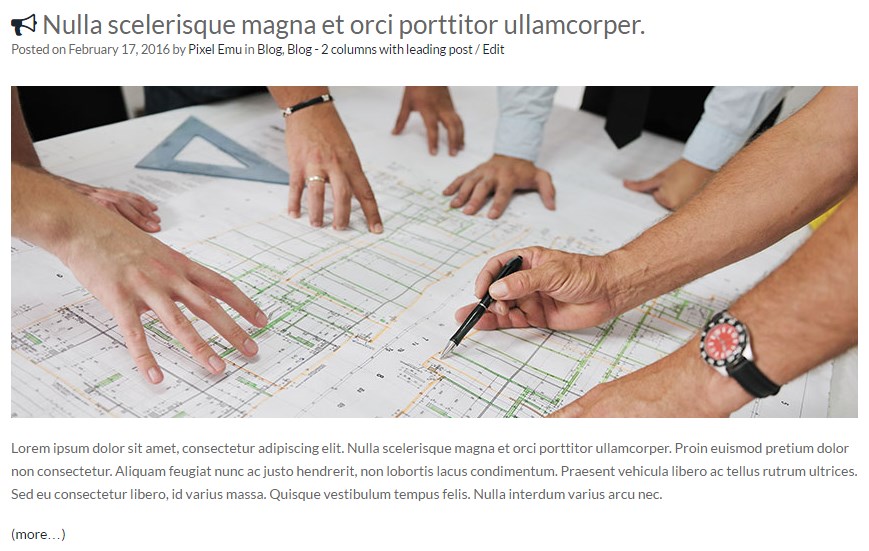
Result:

Nice, but far away from the first screen.
OK, we have small image, now we should load bigger image.
<?php
if ( has_post_thumbnail() ) {
 the_post_thumbnail('large');
}
?>
In this example, WordPress will display image resized to dimmensions provided in Settings -> Media.

Of course we can also set dimmensions manually. Example:
the_post_thumbnail( array(100,100) );
Once we have intro image displayed, now we should take care of placing content on it.
Prepare content
WordPress function responsible for displaying post content in loop is simply the_content() which also may include two optional parameters:
more_link_text: Content for when there is more text.
strip_teaser: Strip teaser content before the more text. Default is false.
Example:
<?php
if ( has_post_thumbnail() ) {

 the_post_thumbnail('large');

}
the_content();
?>
Result:

Now we are in a half way. We have image and content but need to add additional HTML and CSS.
Use additional HTML
Figure, figcaption and div.intro are necessary for CSS purpose.
<?php if ( has_post_thumbnail() ) { ?>

<figure class="pe-blog-effect">

 <a href="/<?php the_permalink(); ?>">

 <?php the_post_thumbnail('large'); ?>

 </a>

 <figcaption>

 <div class="intro">

 <?php the_content();
 ?>

 </div>
 </figcaption>

</figure>

<? } ?>
Add CSS styles
.pe-blog-effect {
 position: relative;
 overflow: hidden;
 -webkit-transition: background 0.35s;
 transition: background 0.35s;
 height: 100%;
 margin: 0;
}

.pe-blog-effect img {
 max-width: 100%;
 height: auto;
 -webkit-transition: opacity 0.35s;
 transition: opacity 0.35s;
}

.pe-blog-effect .intro {
 display: -webkit-box;
 display: -webkit-flex;
 display: -ms-flexbox;
 display: flex;
 -webkit-align-content: center;
 -ms-flex-line-pack: center;
 align-content: center;
 -webkit-flex-wrap: wrap;
 -ms-flex-wrap: wrap;
 flex-wrap: wrap;
 -webkit-box-pack: center;
 -webkit-justify-content: center;
 -ms-flex-pack: center;
 justify-content: center;
 width: 100%;
 height: 100%;
 padding: 30px;
 opacity: 0;
 -webkit-transition: opacity 0.35s, transform 0.25s;
 transition: opacity 0.35s, transform 0.25s;
 font-size: 1em;
 text-align: justify;
 line-height: 1.5;
 color: #666666;
 background: rgba(255, 255, 255, 0.7);
}

.pe-blog-effect .intro a {
 pointer-events: auto;
}

.pe-blog-effect figcaption {
 position: absolute;
 top: 0;
 left: 0;
 height: 100%;
 width: 100%;
 padding: 30px;
 -webkit-backface-visibility: hidden;
 backface-visibility: hidden;
 pointer-events: none;
}

.pe-blog-effect figcaption:before {
 position: absolute;
 top: 30px;
 right: 30px;
 bottom: 30px;
 left: 30px;
 box-shadow: 0 0 0 30px rgba(255, 255, 255, 0.3);
 content: '';
 opacity: 0;
 -webkit-transition: opacity 0.35s, transform 0.25s;
 transition: opacity 0.35s, transform 0.25s;
 -webkit-transform: scale3d(1.4, 1.4, 1);
 transform: scale3d(1.4, 1.4, 1);
 pointer-events: none;
}

.pe-blog-effect:hover figcaption:before {
 opacity: 1;
 -webkit-transform: scale3d(1, 1, 1);
 transform: scale3d(1, 1, 1);
}

.pe-blog-effect:hover .intro {
 opacity: 1;
}
Take a look at the result at this moment:

Of course we can change colors. Just an example:
.pe-blog-effect .intro {
 color: #ffffff;
 background: rgba(0, 0, 0, 0.7);
}

.pe-blog-effect .intro a {
 color: #ffffff;
}

.pe-blog-effect figcaption:before {
 box-shadow: 0 0 0 30px rgba(0, 0, 0, 0.3);
}

Set limit for intro text
But what if somebody publish really long content or article does not include
<!--more-->
quicktag? Then we may use WordPress the_excerpt() function instead the_content()
With this function we can cut-off content to 55 words length or even more, just add simple function in function.php file:
function pe_custom_excerpt_length( $length ) {
 return 20; //number of words
}
add_filter( 'excerpt_length', 'pe_custom_excerpt_length', 999 );
Display readmore link
One more thing - readmore link. By default we see simply (more…) text. But feel free to change it to something nicer, add filter in your function.php
function pe_modify_read_more_link() {

 return '<p class="pe-read-more"><a class="readmore" href="' . get_permalink() . '">' . __('Read more', 'PixelEmu') . '</a></p>';

}

add_filter( 'the_content_more_link', 'pe_modify_read_more_link' );
add some CSS
.pe-blog-effect .pe-read-more {
 margin: 20px 0 0;
 text-align: center;
}

.pe-blog-effect .readmore {
 display: inline-block;
 padding: 5px 20px 0;
 border-top: 2px solid #666666;
 color: #666666;
 text-decoration: none;
 transition: all 0.2s ease-in;
 -webkit-transition: all 0.2s ease-in;
}

.pe-blog-effect .readmore:hover {
 padding-left: 30px;
 padding-right: 30px;
}

Do not forbet about responsive - mobile view
And the last issue - adjusting the effect on mobile devices. The well look depends on content length and image size but on mobile devices image may be too small. In this case we can move content below image for small screen only. Simply add CSS:
@media (max-width: 767px) {
 .pe-blog-effect figcaption {
 position: static;
 padding: 0;
 }
 .pe-blog-effect figcaption {
 box-shadow: none;
 }
 .pe-blog-effect figcaption .intro {
 opacity: 1;
 }
}
In this way, if device screen width is smaller than 767px, content will be placed below image.
Thanks for reading and remember to share / rate the content if you like it!